On Tuesday October 15th Joe Meno and I judged the LEGO entries at the North Carolina State Fair. �We were trying to figure out how many years we’d been judging the LEGO entries and as best as we can recollect, this was the 8th year.
The LEGO entries have come a long way since we started. �Initially entries were allowed to be build from either LEGO or K’Nex and standard kits could be entered. �The first thing we did was eliminate the standard kits (how do you judge two virtually identical entries?) and added the North Carolina theme. �By eliminating the “kit” category, most of the K’Nex entries disappeared as well to the point where the Fair changed the rules to be just LEGO.
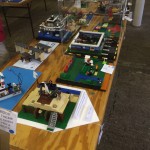
This year the Fair divided the older age group, which had been 10-18 into two groups, 10-14 and 15-18. �We’d been hoping for the Fair to add an adult category and we’ve asked for one for years. �Unfortunately we still don’t have one and probably won’t next year either. �The Fair is very space constrained in the Hobbies and Handicrafts building. �While the LEGO entries moved to the south end of the building, there really isn’t any more space than when they were on the other end. �The Fair is reluctant to add an adult category unless they get more space and in fact, are considering changing the maximum size from 15″x15″x15″ to 12″x12″x12″ or 10″x10″x10″. �Joe and I suggested going down to 12x12x12.
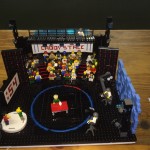
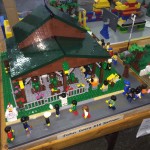
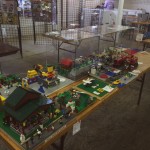
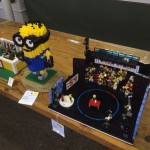
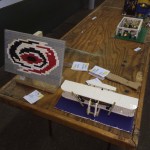
Like most years this year had a number of very good entries but my gut feel was the overall quality of the entries was down significantly. �The highlight of the show for me was the model of the Old Fashioned Ice Cream stand which sits at the Fair just down the from the Hobbies and Handicrafts building in the Village of �Yesteryear. �This entry was really well done and we awarded it best of show. �One of the other highlights this year was we didn’t have to disqualify any entries. �This is the first time in a few years we haven’t had to DQ an entry which was not original work.
Both Joe and I were interviewed by Brooke Cain from the Raleigh News and Observer who wrote an article which appeared in Sunday’s N&O.